Car paint touch-ups are fast and simple means of repairing small scratches or chips that may have been left on your vehicle’s body due to some minor accident. The process involved is straightforward and can be completed in less than three hours.
The typical car touch up paint job usually requires only a few items, including sandpaper, paint, and soft rags, to be completed. However, for touch-ups that will need more materials, there are specialty kits that should contain all that you need and these are available in many auto parts stores.
How To Touch Up Paint Your Car
Although this may appear like a simple car painting project, it’s not because you’ll have to do some research first in order to ensure success. For starters, there are many car paint options available, but you should settle for a car touch up paint pen which works best for small dented areas.
Then there’s the paint colors, the shades of which are just as numerous. Choosing the correct one for your car may not be as easy as you may have initially thought.
In any case, all other supplies that you may need to begin a touch up job will depend on the extent of your vehicle’s damage, although the following are important:
- Clear coat paint
- A cotton cloth
- Sandpaper and a block sander
- Rubbing compound
Common Touch Up Paint Problems
1. Over-commitment
It’s easy to say that you’ll finish the job on your own, but after getting started, you run into a few bumps that dampens your enthusiasm. If there’s even just a trace of doubt about completing your car paint touch up plan, it’s probably better if you just bring your vehicle to a professional auto body shop.
2. Over-sanding
This is a problem common among over-eager car owners. A car touch up paint job is a minor task, so keep it that way. Always remember that you’re only sanding a tiny spot on your vehicle to prepare it for the touch up. With that in mind, you need to ensure that the other areas do not get involved.
3. Rust Removal
Some people actually think that a touch up paint for their cars is an effective means of removing vehicle rust. If you’re thinking the same way, then you’re only putting your vehicle into more trouble.
4. Wrong Paint Color
This has to be the most common problem you’ll encounter when it comes to painting cars. Even if that car dent is small, covering it up with the wrong shade of color will only make it more noticeable.
Steps On How to Touch Up Paint Your Car
1. Identify the damage.
When inspecting your car’s surface, shine a bright light across its entire length. Consider using a piece of masking tape to mark the damaged area.
2. Clean the car surface.
Before painting cars, especially your own, it’s always recommended that you clean them first. If possible, have them washed thoroughly. A second round of cleaning is advisable by spraying your car with the use of a glass cleaner. Follow this up by drying the car with a microfiber towel.
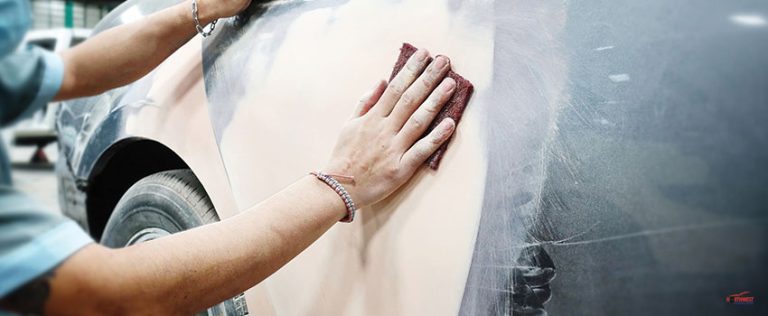
3. Sand the target area.
The affected area should be sanded well to prepare it for painting. To sand the area around the chipped spots, use a small sanding pad or 1500-2500 grit of sandpaper. For the target area, sanding should be short and light. The entire sanding process should result in a uniform appearance and the paint no longer glossy. To check this, use your finger and rub it all across the sanded area.
4. Clean the sanded area with paint thinner.
Use paint thinner to clean the sanded area and prepare it for the automotive touch up paint job. Get a cotton swab and dip it into any general-purpose automotive paint thinner to clean the chipped part of your car. The thinner will also help your touch up paint to adhere well. This is crucial because for the repair paint job to be successful, your touch up should stick well to your vehicle so it can withstand the pressures of driving.
5. Begin the touch-up.
A car touch up paint pen or even a fine-tip paintbrush can be used when applying a base coating to match your car’s color. Apply only a small amount of paint to the tip of the brush then lightly rub it over your target area. The paint should lose its volume gradually, but that’s expected. Just make sure that you allow the paint to dry completely before applying the clear coat.
6. Ensure a smooth surface.
If you’ll be painting cars that will involve deeper dents or chips, you will need to work on building the paint up so that this will be flush with your car’s entire surface. This will have to be done step by step, letting the paint dry after every layer.
7. Apply clear coat.
Once the base coat has dried completely, finish your touch up job by sealing it with a clear coating. The dabbing technique can still be applied using a fine-tipped paintbrush. If you think a second clear coat is needed, it’s best to allow the initial one to dry completely first.
8. Let the touch up paint dry.
Once you are satisfied with the quality of the paint and how it looks, then your job should almost be done. The only thing left to do is to allow the paint to dry completely and harden. This should happen in the next 48 hours at least.
9. Apply paint polish.
Use a car polish compound after the paint has completely cured.This will give the painted area and even the entire car a glossy new look.
Contact Northwest Collision Center for All Your Car Painting Need
Touch up painting does look easy, but if you only want the best car touch up paint job for your vehicle, it’s best to take it to Northwest Collision Center. With us, you can expect to receive the best deal in car re-painting.
We offer top-notch services for auto body repair in Pinellas Park, FL. Call us today to get the details and to find out about our other services.